Guides/Monitoring network traffic from an Android app
To monitor and view network traffic in an Android application, you can use a proxy server. This guide will help set up your device and view network traffic from a specific Android app.
Prerequisites
To follow this guide, you have to have:
- an Android device (you do not need root access),
- a computer (with any operating system),
- a USB cable to connect your mobile device to the computer.
- access to a Wi-Fi network that you can connect to with the computer and the mobile device.
Step 1. Install a proxy server
In this guide, we will use the Charles proxy server. There may be other, better alternatives that I have not tried using. Feel free to edit this guide if you feel like you have a better proxy server.
Note: The free trial version of Charles only allows for 30-minute sessions. After that time passes, you can reopen Charles to continue using it.
- Go to https://www.charlesproxy.com/download/ on your computer, and download the version of Charles for your operating system.
- Launch Charles.
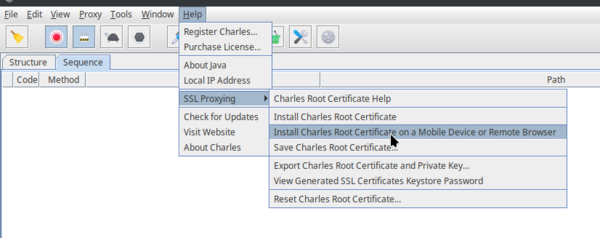
- At the top bar, select the option Help > SSL Proxying > Install Charles Root Certificate on a Mobile Device or Remote Browser.
This will show a message box with your computer's local IP address and a port. In the next step, we will use this information to connect the mobile device to the proxy server.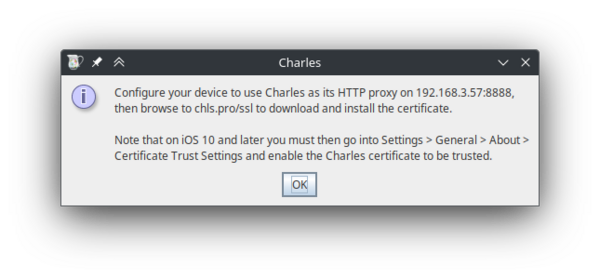
In this example, the IP shown on the pop-up is: 192.168.3.57, and the port is: 8888.


Step 2. Set up proxy settings on the mobile device

To make network traffic go from the device to your proxy server, you have to set proxy settings on your mobile device.
- On your mobile device, go to Settings > Wi-Fi and select your Wi-Fi network.
- Under Advanced settings, change Proxy to Manual.
- Set the Host Name and Port settings to the IP address and port displayed in the Charles pop-up window in step 1.
- Save the settings.
- If everything was done correctly, a pop-up should appear in Charles, informing of a new connection. Click on "Allow" to allow the proxy connection. If you click "Deny" on accident, you can simply restart Charles and try to connect to the proxy again.
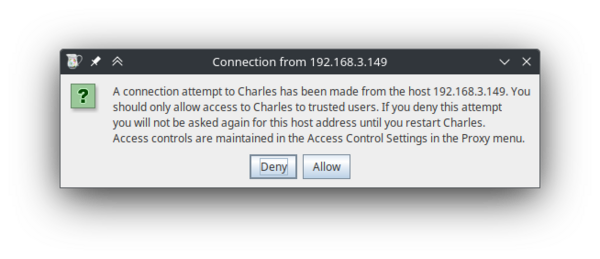
This pop-up window should appear on your computer after saving proxy settings on the mobile device. - After clicking allow, you can see some network traffic going through. You can try opening apps on your phone, and new entries will appear.
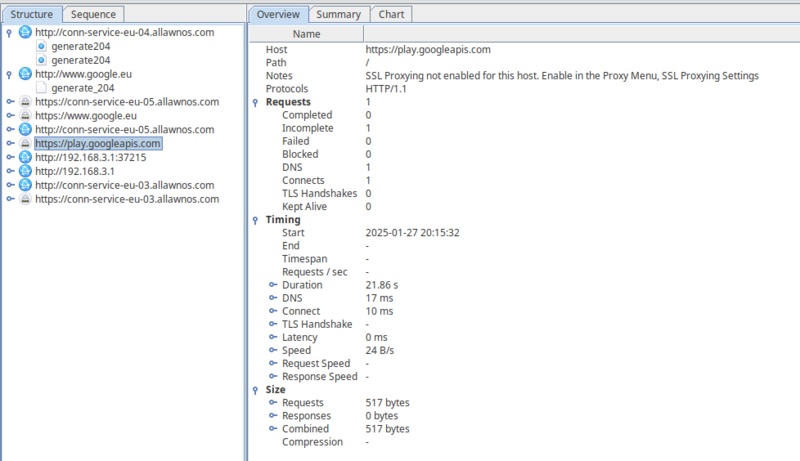
Network traffic from your mobile device, shown on your computer.
You can also enable Sequence view by clicking the Sequence tab on the top. This will show all of the network traffic in chronological order, with the most recent requests on the bottom.


Now we have set-up our proxy server. However, even though we can see some host names and parts of requests, we cannot actually see the contents of most of the requests. This is because all modern applications use the HTTPS protocol to communicate; this protocol encrypts the data to prevent man-in-the-middle attacks.
This current setup will still work for HTTP requests. If you try to access a website via HTTP on the mobile device, you will be able to see the contents of the request, as well as the response in Charles. This is because, unlike HTTPS, HTTP is not encrypted, and the proxy server can read requests and responses sent via HTTP. You can try this yourself by opening an HTTP website (such as http://example.com/) in a web browser on your mobile device. You should see something similar to this:
(Note: You may need to scroll down to see the newest requests in Sequence view.)

In the next steps, we will install a custom certificate and modify an application, which will allow us to intercept HTTPS requests as well.
Step 3. Install a certificate to the mobile device
To look inside HTTPS requests, we need to install a certificate to our mobile device.
- On your mobile device, open your browser and type
chls.pro/sslinto the URL bar, while connected to the proxy. This will allow you to download the certificate for your instance of Charles. Tap on the "Download" button to confirm that you want to download the certificate file.
This URL is also shown in the Help pop-up window in Charles - it's in the same pop-up that we used to get the IP and port for the proxy settings. - Go to Settings and search for options about certificates. On my device, it is under Settings > Password & security > System security > Credential storage. From here, you should be able to view, add, and remove certificates installed on the system.
- Select Install certificates from storage, and then CA certificate.
- A pop-up may show up, warning you of the safety concerns related to adding custom certificates. Read it, and if you are sure you want to do this, tap on Install anyway.
Remember! After you are done exploring network traffic from an app, you can remove the certificate by going into this settings menu, selecting Trusted certificates, switching to the User tab, selecting the certificate and tapping on Uninstall. - You may be asked to verify your identity. After confirming your identity, you will be asked to choose a file. Select the file you downloaded before - it should be named
downloadfile.crtand it should be located in yourDownloadsfolder. - After selecting the file, the certificate should be installed. You can verify that, by going into the Trusted certificates menu, and selecting the User tab - your certificate should be there. You can tap on it to view detailed information about the certificate or uninstall it if you don't need it anymore.
The certificate should now be installed properly on the mobile device, however we still will not be able to see HTTPS traffic in Charles.
Step 4. Enable SSL Proxying in Charles
To enable SSL proxying in Charles, do the following steps:
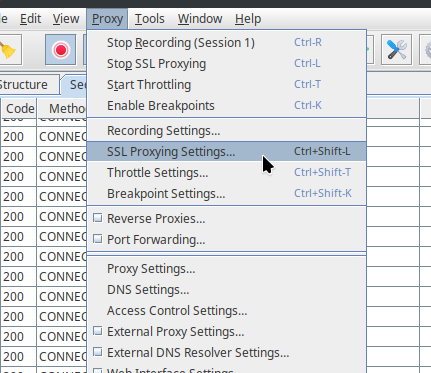
- From the menu bar at the top, select Proxy > SSL Proxying Settings....
- Make sure the Enable SSL Proxying checkbox is enabled.
- Below the Include table, click on Add.
- In the pop-up, for the Host field, enter
*and leave the Port field empty. This will make it so all hosts' HTTPS requests will be captured and attempted to be read by Charles. - Click on OK on the pop-up, and OK on the "SSL Proxying Settings" window.

If you now try to open an application on your mobile device, you will see that it will not be able to connect to the servers. This is because all traffic is now captured by Charles. Most apps do not accept user-installed certificates as valid, which means even though our certificate is installed, the applications are acting as if it is an unknown certificate, and therefore cannot connect to the server at all.

If you want to allow some hostnames to use SSL as normal, you can add them to the Exclude table in the "SSL Proxying Settings" window. This setting makes it so Charles just acts as a pass-through for that specific host, and doesn't attempt to read any data inside of the requests. Alternatively, you can add hosts to the Include table instead of the * wildcard. This will make it so only the hosts in the Include table are captured by Charles.
Step 5. Modify an application to allow user-installed certificates
We will modify the application slightly so that it will accept user-installed certificates. In this guide, we will be using Rizline as an example.
First we will need to download some tools:
- To connect to the device via a USB cable, we will use Android Debug Bridge (adb)
- To decompile and build Android applications, we will use Apktool. To download and install Apktool, follow the instructions on this page: https://apktool.org/docs/install.
- To optimize the built APK, we will use zipalign.
- To sign the modified APK, we will use apksigner.
If everything is installed correctly, you should be able to open a terminal and type adb, apktool, zipalign and apksigner commands without errors.
This page has some work to do. Help the wiki by editing this page!
- Add download link to adb, zipalign and apksigner
- Finish the guide